How to Add Apps to Braze SDK
Braze SDK lets you collect session data, identify users, and record purchases and custom events through your website or app. It's also used to engage with your users by sending in-app messages and push notifications directly from the Braze dashboard. This article explains how to add apps to your workspace.
1. Once you have used the relevant email address to sign into the platform, you will have access to the Braze dashboard.
2. Before proceeding, please double-check you are in the correct workspace, which is noted in the top left hand corner of the dashboard (i). If you have multiple workspaces, you can choose between them by clicking on the current workspace and opening up a menu (ii).
(i) 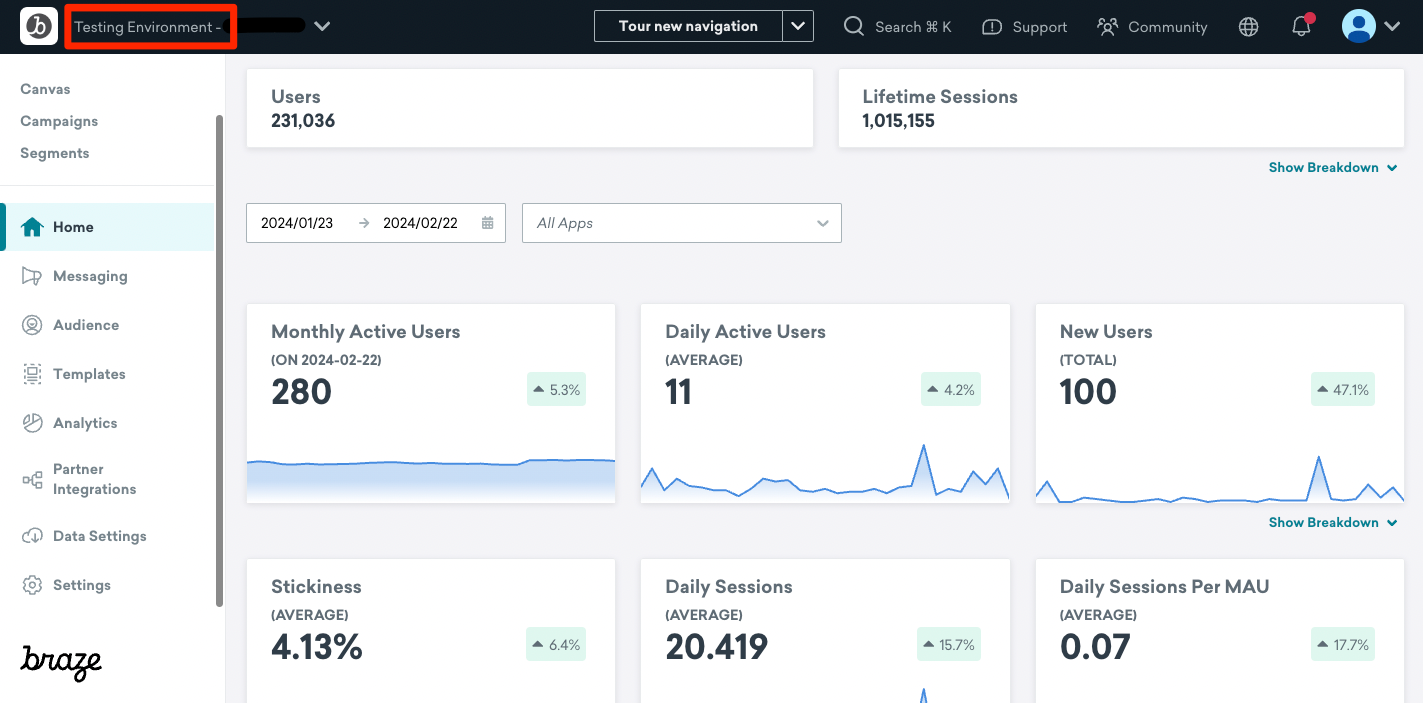
(ii) 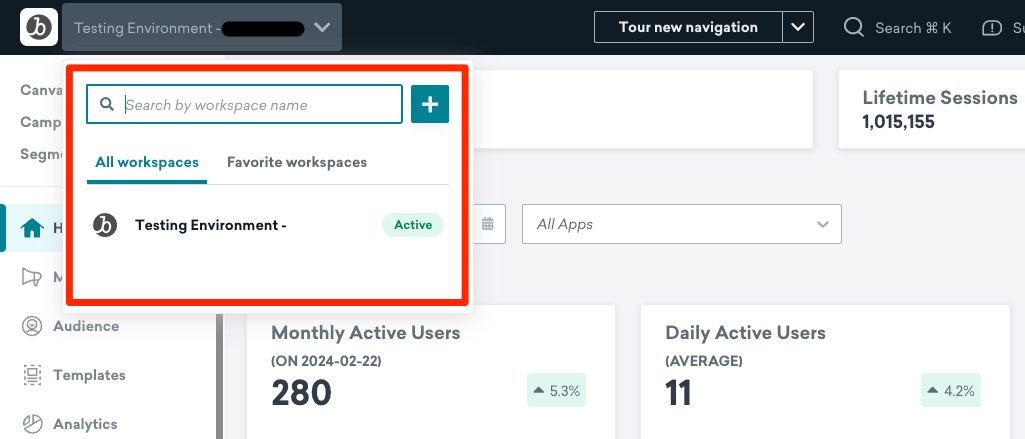
3. Next, you need to add an app for both Android and iOS. To do so, scroll down to 'Settings' (a) - then, select 'App Settings' (b).
4. From there, click on [ + Add App ].
5. You will then be presented with options for adding an app to your workspace. Make sure to give the app a name (a), then select the platform (b), then 'Add App' (c). After that, repeat the same process but this time select 'iOS'.
 PLEASE NOTE: Each platform needs to be done separately, meaning, don't select 'Android' and 'iOS' together. Again, each platform needs to be added separately.
6. After all the apps have been added, please give your credentials for accessing Braze SDK (the relevant email address, workspace name) to your customer success manager. Our team will then complete all the internal configurations and you will be duly notified once everything is ready.